Being able to check some code changes or a design with a screen‐reader is a major part of understanding accessibility, but many people put it off as it is so daunting.
It’s certainly understandable as most times you might see people using a screen‐reader they will have the speed turned up so high it is difficult to follow and they might jump around the page seemingly randomly.
But, for the most basic of testing, a simple top to bottom run through the page, you only need to know one or two keys commands.
How screen‐readers move about a page
Before we get into starting up our screen‐reader, let’s think about how a screen‐reader will move you around the page.
Where am I?
The first thing you might want to know when you land on a page which you can’t see, is “am I on the right page?”. To help with this the first thing you will hear when a page loads is the contents of the page title element. This is why having the title contain the purpose of the page (ideally the same as the page's h1 ) as well as the site's name is a great idea.
Not your typical keyboard user
Yes, screen‐readers make use of the keyboard to navigate, but put away thoughts that you will be moving about the page by hitting the tab key. Doing that will only let you hear the interactive content (links, form inputs, buttons etc), so you wouldn't really be able to listen to an article by tabbing around.
Instead you’ll be using the arrow keys to move up and down the page. As you move you will see an outline around content and this is a visual representation of what’s called the virtual cursor. This allows you to move by blocks of text, reading it aloud as you go, but will also read out extra information when you get to buttons, form inputs or other components.
As you move around the page you will see the browser focus (that focus state you get when you tab about with a keyboard) move with you when you reach an interactive element like a link, but then get left behind as you carry on using the virtual cursor.
One long tube
As you move about with a screen‐reader you will notice that the reading order follows the code order. To a screen‐reader user the page is always one long tube of content - the visual layout doesn’t really matter - which is also why “directional content” (where you might refer to content “over to the right”) is discouraged (although “above” or “below” is generally ok).
Don’t sweat the content
You might hear some content read out differently to how you might expect. In general, don’t worry about this (or check with an experienced user) as screen‐reader users can have different settings depending on their preferences. In particular reference numbers is one area where we see developers trying to force the screen‐reader to read it out in a particular way, not realising that all screen‐readers allow users to move character-by-character if required, so they can easily check the exact details if they want.
If you find yourself thinking more content is needed to help screen‐reader users understand an interface, the chances are they either don’t (again, check with an experienced user), or that content would help all users, or the interface may need to be reworked.
Mac users
If you are a Mac user then you already have a screen‐reader installed called Voiceover.
Most screen‐readers work best with specific browsers and in Voiceover’s case that is Safari.
You use Command + F5 to start (and importantly to stop) Voiceover.
Windows users
If you are on Windows, whilst there is a pre-installed screen‐reader called Narrator, it doesn’t have heavy usage so for testing I’d recommend using NVDA, which is a free download.
Most screen‐readers work best with specific browsers and in NVDA’s case that is Chrome or Firefox.
When you start NVDA it will appear as a tool tray icon near the date and time, you may need to expand the tool tray to see it. You stop NVDA just like any other application.
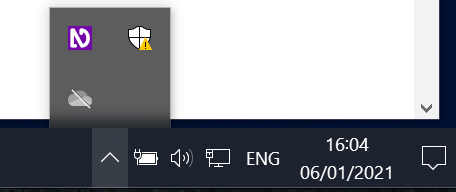
Clicking on the icon will allow you to access the various settings.
There are a couple of setting changes which I recommend you make to NVDA.
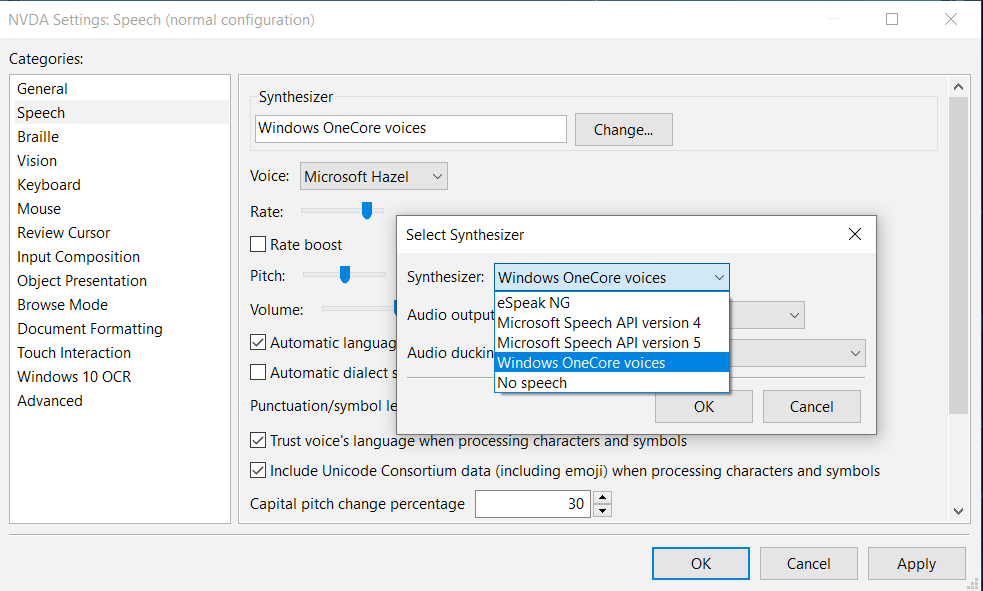
Change the voice
The default one is very robotic and quite difficult to listen toGo to “Preferences”, then “Settings”, then “Speech”. Try out some of the synthesizers from the drop-down. Different voices using that synthesizer are available from the voices drop-down below it.
I find the Windows OneCore Hazel voice to be quite good, but try a few out and find one which you are happy listening to.
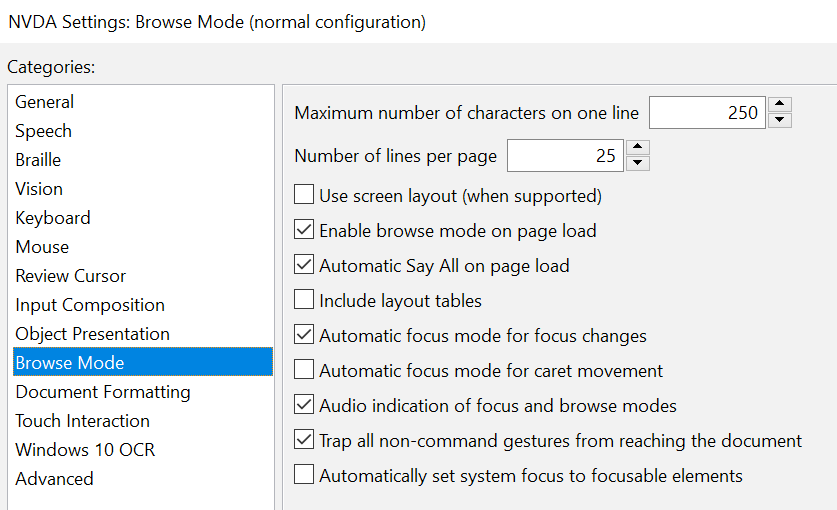
Turn off Say All
This stops NVDA from just reading out the whole page as soon as it loads.“Preferences”, then “Settings”, then “Browse Mode” and uncheck the “Automatic say all on page load” option.
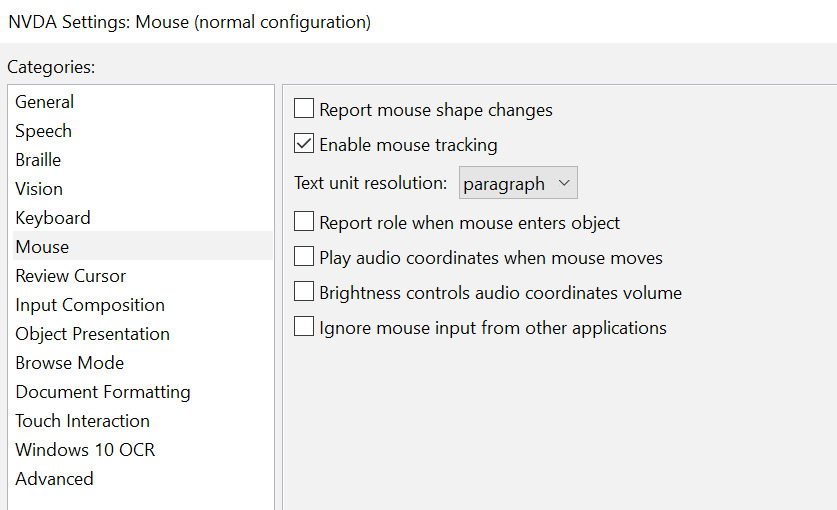
Turn off Mouse Tracking
This prevents NVDA reading out whatever is under your mouse cursor which makes it really easy to lose your place when testing things.To turn this off go to “Preferences”, then “Settings”, then “Mouse” and uncheck “Enable mouse tracking”.
Getting started
We’ll pick a simple (and well built) site to test our new screen‐reader skills. Open GOV.UK in the recommended browser and turn on your screen‐reader (you can use your mouse to place focus on the page, but once you have done that just use the keyboard).
The first thing you will notice is an outline around the element the screen‐reader is focussed on (remember this can be anything, including the whole page). This is the virtual cursor and will show you what the screen‐reader is talking about as you move about.
Before we start moving about, one useful key command to know is Ctrl - this stops the screen‐reader talking, until you navigate again. It can be very useful!
Let’s try just moving through the page.
If you are using Voiceover you will use Ctrl + Option + right arrow to move down the page (note, if the black outline is on the whole page, you might need to enter the page first by hitting Ctrl + Option + shift + down arrow - don’t worry, that’s the most complex combo you will need!). To move back up the page switch out the right arrow key for the left arrow key.
If you are using NVDA you just need to use the down arrow. To move back up simply use the up arrow key.
That’s it - that’s the basic navigation for using a screen‐reader!
Navigating by headings
This is all well and good, but it can take a long time to read through all of a page like this. So let’s add in one shortcut, navigating by headings.
For Voiceover you can use Ctrl + Alt + Cmd + h to jump from heading to heading, NVDA users have it a lot easier as they can just hit the h key to do the same. Add in the shift key to reverse the direction.
You will hear the heading level read out as you do this and this highlights the importance of getting your heading hierarchy right as navigating by headings is a good technique for someone to get a mental layout of a page and its content and how it all relates to each other.
Keep going
Now you have started with your screen‐reader of choice, carry on learning the basics - I wrote some screen‐reader beginner’s guides (for NVDA, Voiceover and JAWS) which take you through everything from how to understand what the screen‐readers are saying, to viewing lists of links and headings, how to navigate tables and more.