Published 11 May 2023
This guide will help you learn the basics of NVDA and some tips on how to test a site with it.
It is designed to showcase how to navigate and move around a webpage with a screen‐reader, so you will be using the screen‐reader to read and move through the guide itself, learning commands as you go.
This guide was written using NVDA 2023.1 and Chrome 113.0. Updates to either since this guide was published can impact the results you get.
Operating system level
As NVDA is a (Windows-only) operating system level screen‐reader (just like all the mainstream screen‐readers), it means that it can be used for pretty much anything on the computer. That also means you can move away from the web page and into the address bar. But this also means it can be easy to end up somewhere other than the site you are testing.
If you get lost you should use your mouse to click back onto the browser. We are testing the websites, not your ability with the screen‐reader (although it is worth checking you getting lost was not a result of code on the site).
Installing NVDA
As NVDA is not built into the OS like Voiceover or Narrator, you will need to install it, but unlike JAWS it is free. If you have not got it installed already, download NVDA for free from NV Access.
You should test with the latest version. As NVDA is has regular releases you may get prompts to install updates from time to time, it is essential to install these as soon as possible as they will include bug fixes and improvements. So if you already have NVDA installed it is worth checking to see if there are any pending updates.
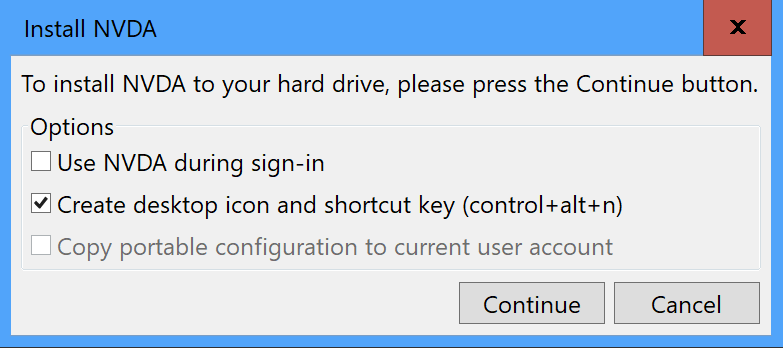
When installing you want to be sure to uncheck the "Use NVDA during sign-in" option as otherwise NVDA will start up on your login screen.
Browser choice
Screen‐readers tend to work best with specific browsers. In the case of NVDA it is best to test with Chrome, but Firefox is also well supported, although currently not as popular. This guide uses Chrome. If you are testing a site you should check with both browsers. If you test with other browsers you might get some odd behaviour.
If you are not reading this guide open in either of these browsers now is the time to switch browsers as the next stage will be to actually open the screen‐reader.
How to start and stop NVDA
You start NVDA just like any other program in Windows. When you start NVDA it will appear as a tool tray icon near the date and time, you may need to expand the tool tray to see it.

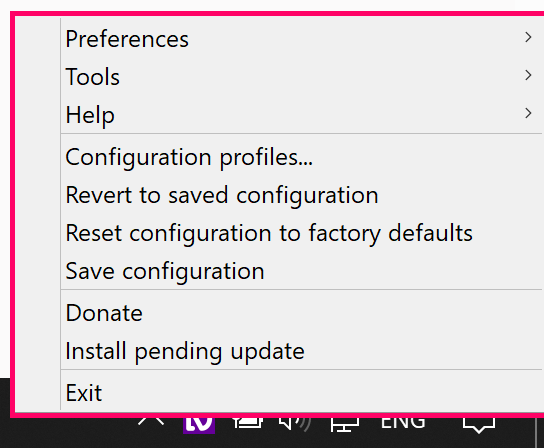
Clicking on the icon will allow you to access the various settings, including exiting NVDA. Whilst we recommend you leave most of the defaults to make consistent testing possible, there are a couple of changes which will make testing easier.
Settings
For the most part we want to change as few settings from the default as possible to make it easier to repeat issues we find. Also bear in mind that users who are new to screen‐readers are unlikely to change many settings.
However there are some settings which won't affect our testing but will make NVDA easier to operate.
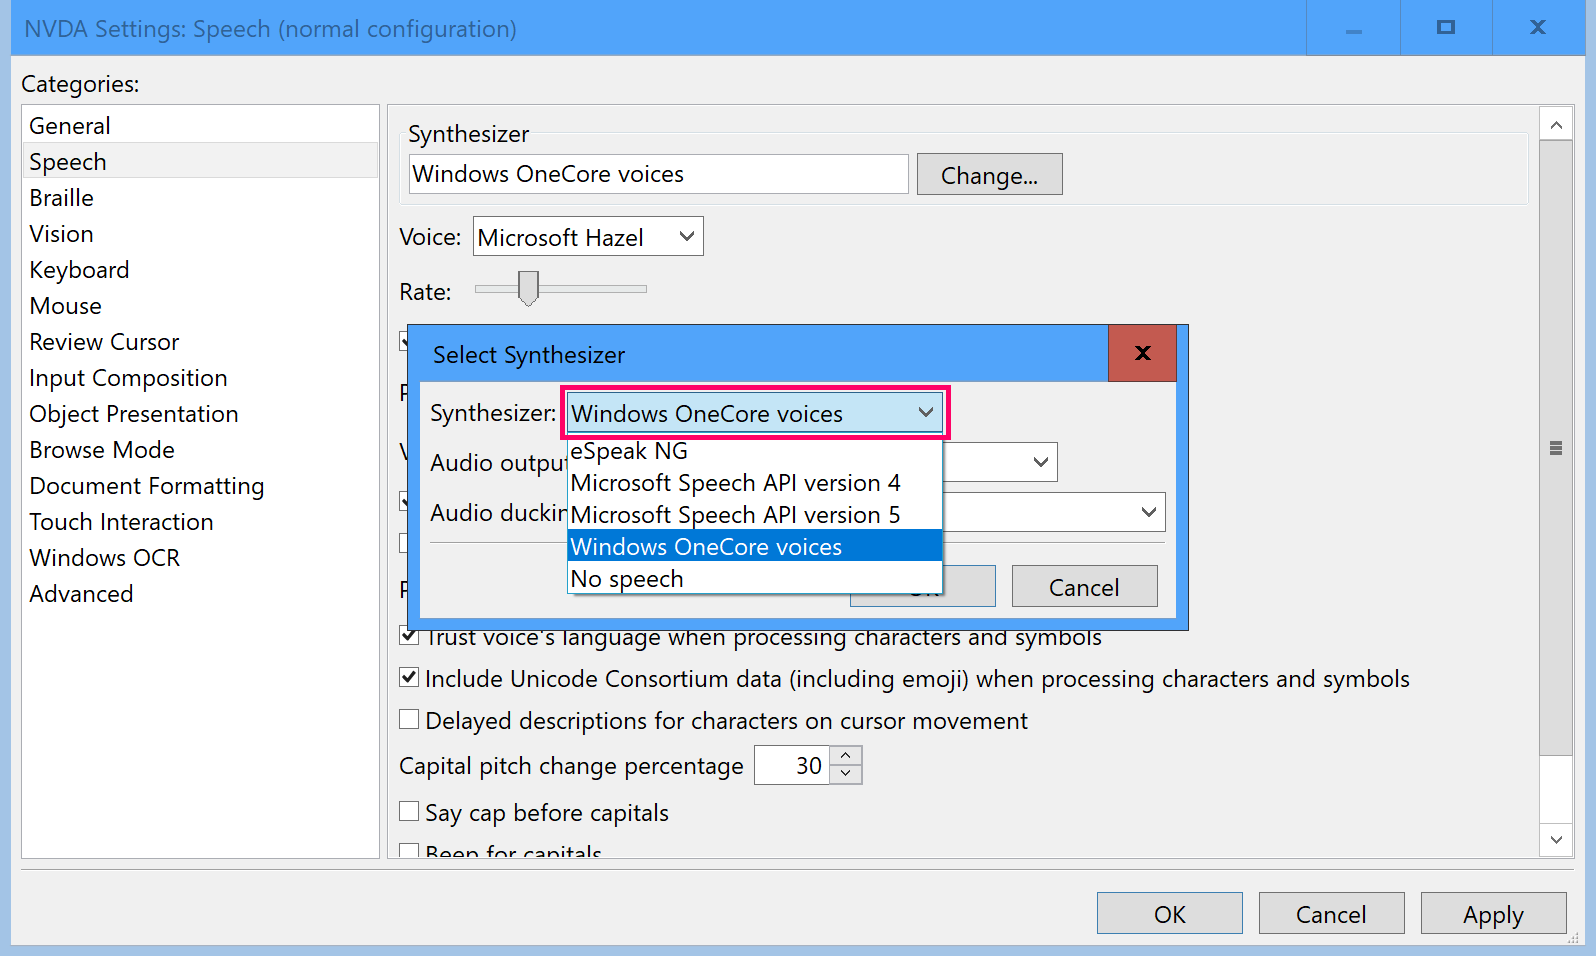
Change the Voice Synthesizer
The default voice NVDA uses is very robotic not especially pleasant to listen to for long periods at the speed we will be using for testing. We suggest you change it to use a different synthesizer which sounds more human.
Insight Whilst the default robotic voice might not be pleasant to listen to at the speed we will be, experienced screen-reader users find that this style of voice makes understanding words easier when the speech speed (or rate) is much higher.
To change the voice used, click on the NVDA icon in the system tray and go to Preferences > Settings > Speech, then under Synthesizer click the Change button to try out some of the synthesizers from the drop-down. Different voices using that synthesizer are available from the voices drop-down below it.
I find the Windows OneCore Hazel voice to be quite good, but try a few out and find one which you are happy listening to.
Speech rate
As you gain experience and get used to the screen‐reader voice you will probably want to increase the speech rate (in other words speed) of the announcements. But whilst you are getting used to it you might want to keep it relatively slow.
From the same settings section as the voice options above, adjust the “Rate” slider to pick a speed which you can follow.
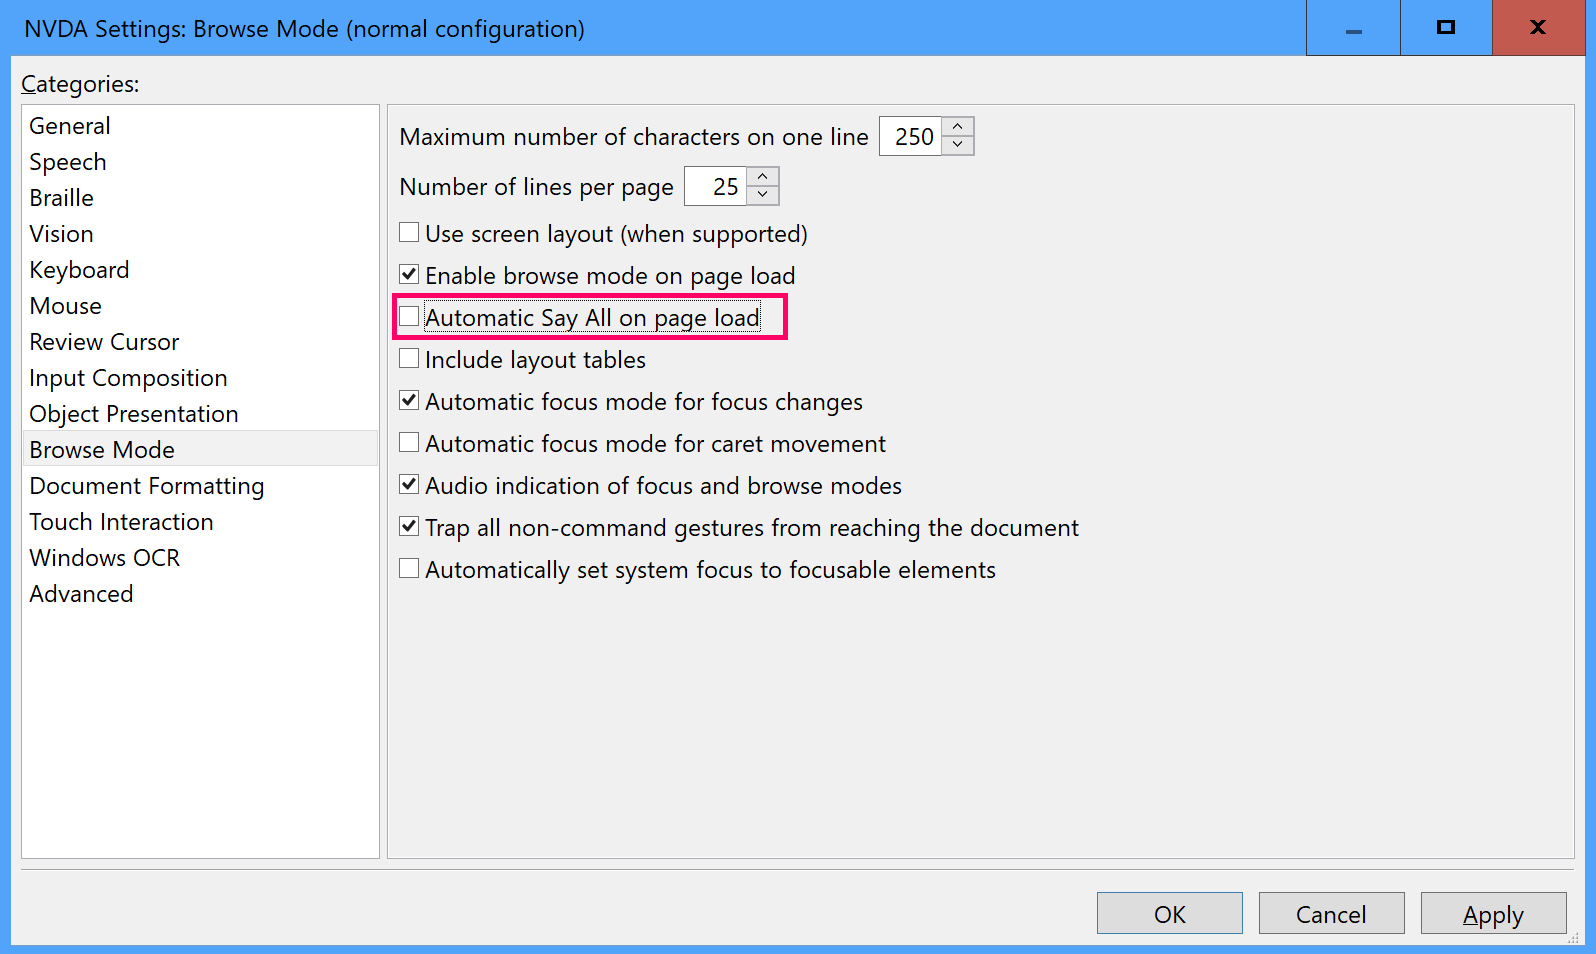
Turn off Say All
When NVDA loads a new page, the defult setting is for it to read all of it out. As this can get annoying when testing, feel free to turn this off by clicking on the NVDA icon and going to Preferences > Settings > Browse Mode and unchecking the “Automatic Say All on page load” option.
Turn off mouse tracking
If you hover over on anything now with the mouse, NVDA will announce what it is, and this will be the same for anything in the operating system as NVDA is an OS‐level screen‐reader. Whilst this can be useful for some real-world users, you shouldn't be using your mouse when testing, and turning this feature off makes it easier to keep your place. To turn this off go to Preferences > Settings > Mouse and uncheck “Enable mouse tracking”.
Modifier key
NVDA uses single key commands most of the time, but sometimes you will need to use a combination to access certain features, such as element listings. When doing this you will most likely be using what is called a "Modifier key". This is a key which is specified to tell NVDA you want to perform a specific action and this can be configured in the settings.
Access the modifier key settings by clicking the NVDA icon and Settings > Keyboard.
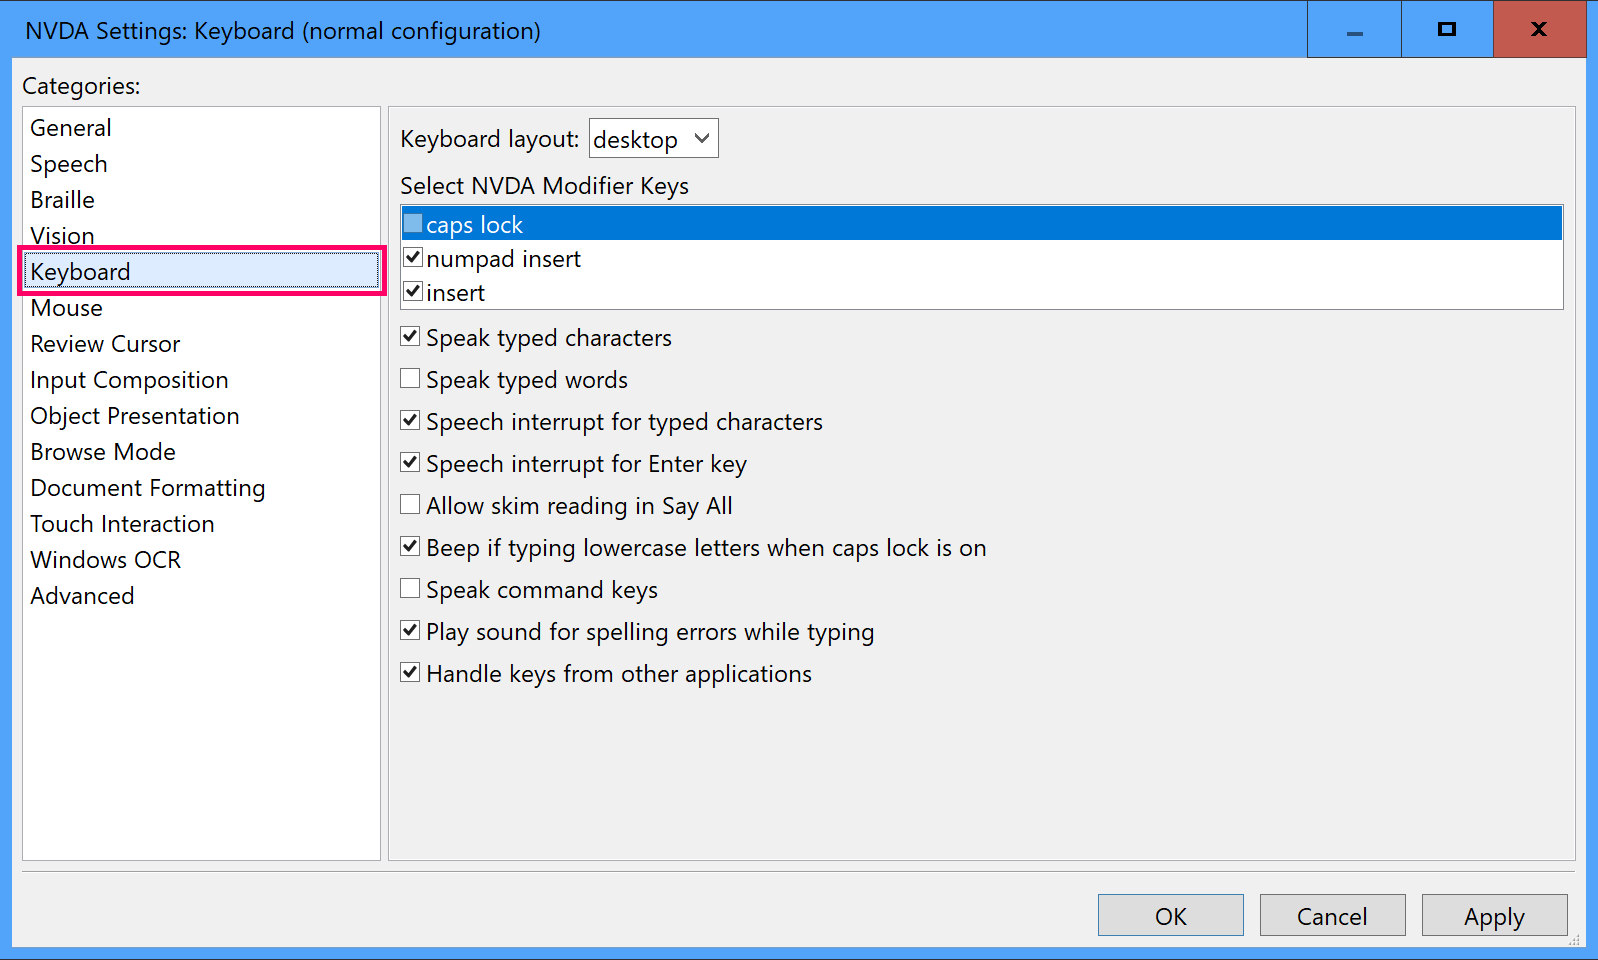
There are three options for modifier keys - Caps Lock, Numpad insert or insert - and you can choose to have all active. It really depends on what your keyboard layout is as to which keys you choose. If you are using a Mac keyboard, then you might want to use something like SharpKeys to map insert to another key (I use ` as I'm unlikely to use it with NVDA).
In all the following steps I'll refer to this key as NVDA, but you should replace it with whatever key you have set.
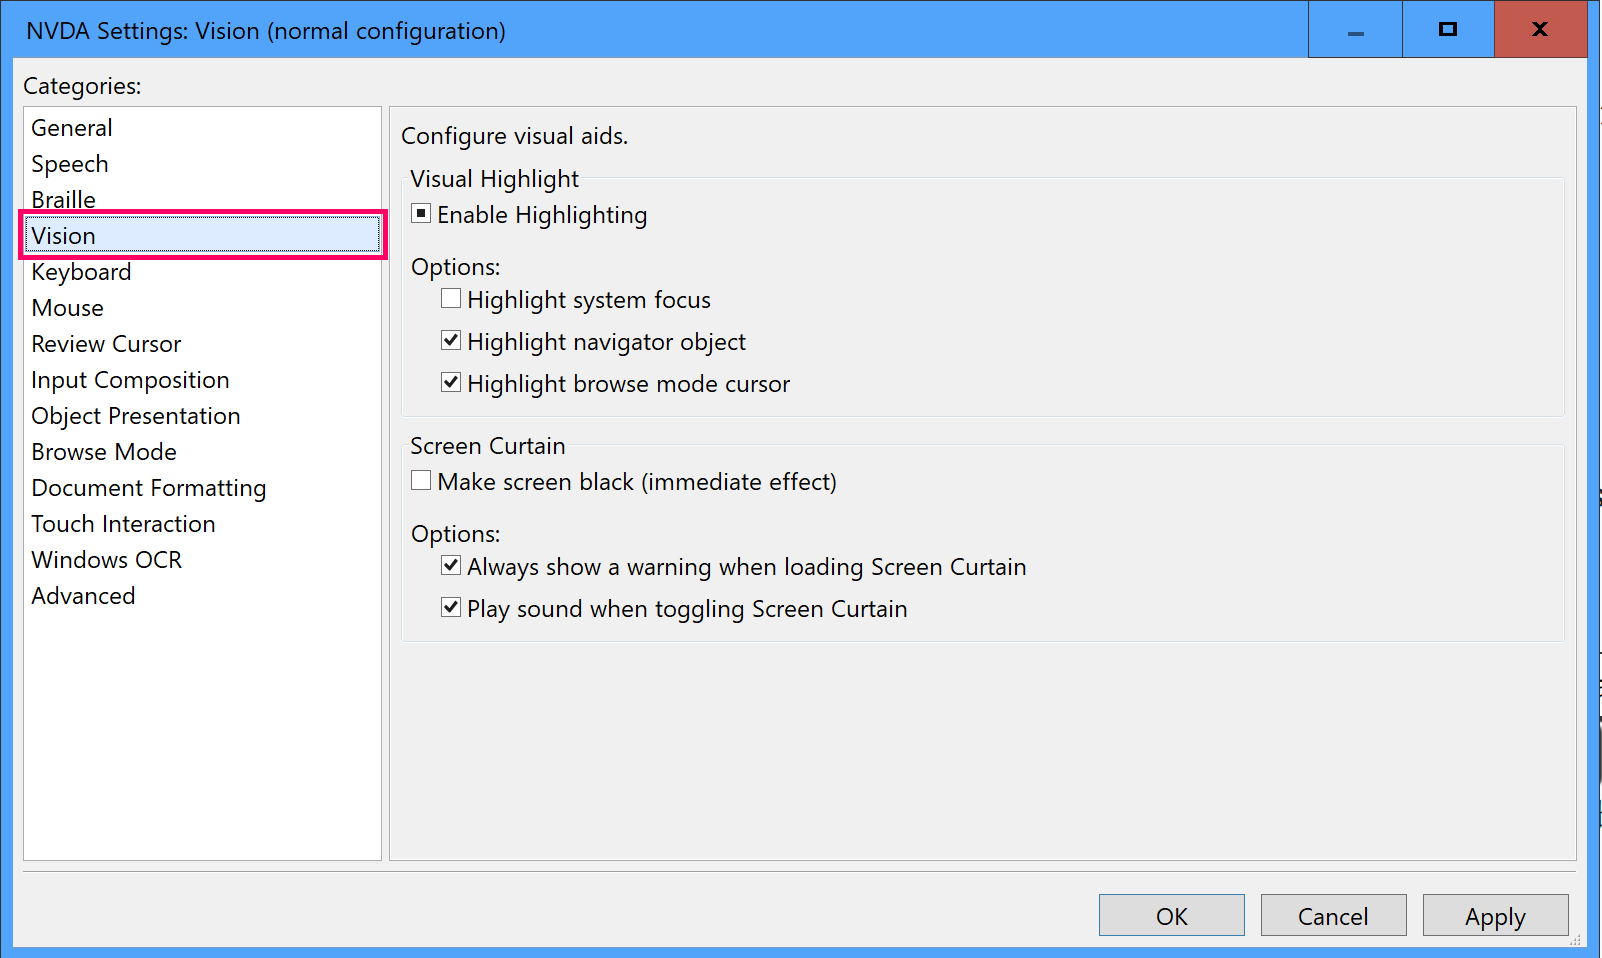
Visual tracking
Not all screen‐reader users are fully blind so it can be helpful to have a visual indicator to show where NVDA is currently reading on the screen. This is also helpful for us as people who are using NVDA as a testing tool. The tracking option is normally enabled by default, but in case it isn't you can access it by clicking the NVDA icon and Settings > Vision. Check “Enable highlighting” and check the “Highlight navigator object” and ”Highlight browse mode cursor”. These will place a red border around the current item, a faint yellow box as a cursor (for navigating by character or editing). You can also check the first box for “Highlight system focus” but I find this is not necessary for website testing.
Speech viewer
NVDA has the option of outputting to a visual speech viewer as well as making audible announcements. This can be useful (especially for deaf screen‐reader users), but be careful about relying on this rather than listening to the actual audio (which most users will be restricted to). Relying on the viewer can mean you miss insights which the audio provides, such as live region announcements being drowned out.
The speech viewer appears as a floating window and displays a stacked list of past announcements.
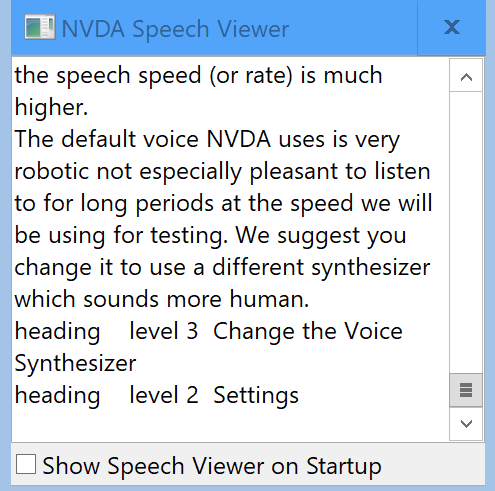
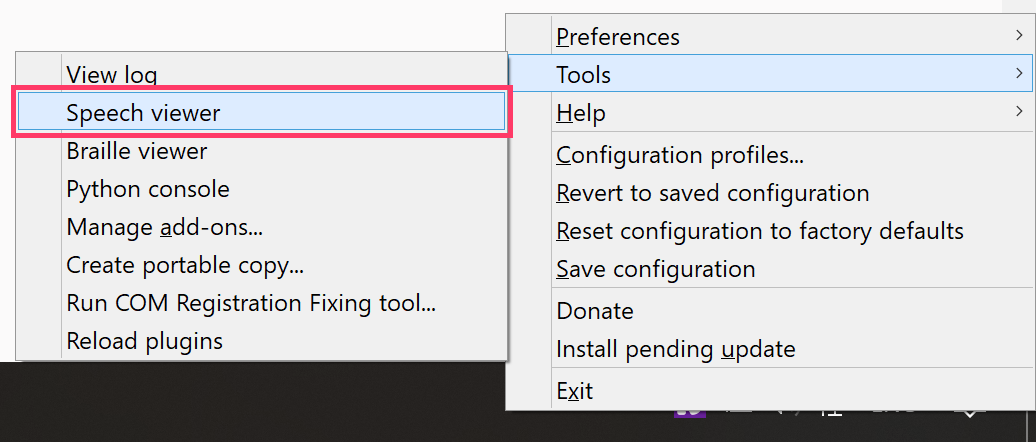
To enable the speech viewer click the NVDA icon and choose Tools > Speech Viewer.
Getting started
Activity - not just for the web
With NVDA now running, if you click on anything now with the mouse, NVDA will announce what it is, and this will be the same for anything in the operating system as NVDA is an OS‐level screen‐reader.
Try this, maybe try clicking on the Windows Start menu, and then come back to the browser.
For now, let's just go to the next section using your normal mouse or keyboard but leaving NVDA on. For the rest of our testing we'll be putting the mouse aside and just using the keyboard.